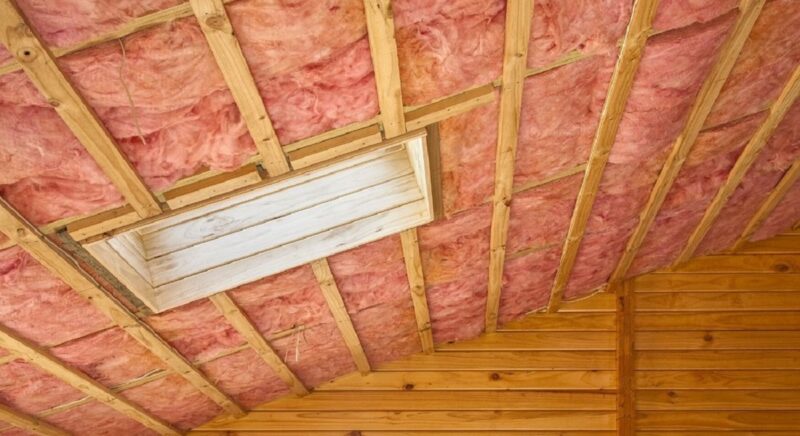
Pink insulation is a widely used material in the construction industry for its thermal and soundproofing properties. But what is pink insulation made of? This type of insulation is typically made from a combination of natural and synthetic materials, such as fiberglass, rock wool, and recycled materials. The manufacturing process typically involves melting the raw materials and spinning them into fibers, which are then bonded together to form the final product. The pink color of the insulation is often the result of an added dye, which helps to differentiate it from other types of insulation. Overall, pink insulation is a highly effective and eco-friendly way to improve the energy efficiency and comfort of homes and buildings.
Fiberglass
The primary component of most pink insulation is fiberglass. Fiberglass itself is made from beautiful fibers of glass. To make fiberglass, glass is first melted down and spun into thin strands. These glass strands are then woven into a texture similar to wool or cotton.
The result is a fluffy, cotton-candy-like material containing tiny air pockets between the glass fibers. These small air pockets give fiberglass excellent insulating properties, trapping heat to keep it from escaping.
Binder
While fiberglass gives pink insulation its structure, a binder holds the cotton candy texture together. Binders are adhesive-like substances with glass fibers together and provide insulation with their distinctive pink color.
The most common binder used in pink insulation is phenol-formaldehyde resin. This thermosetting plastic binder is made from a reaction of phenol and formaldehyde. A stiff yet flexible resin helps the insulation hold its shape and remain fluffy.
Other binders sometimes used include acrylics, polyester, and urea-based polymers. The binder comprises about 5-20% of the total weight of the insulation. Without this binding agent, the pink insulation would fall apart into thin wisps of fiberglass.
Fire Retardant Additives
One important additive to pink insulation is a fire retardant. Plain fiberglass and binder, on their own, are flammable. To reduce the fire risk, pink insulation contains fire-resistant compounds.
The most common fire retardant used is boric acid. Boric acid is a white, crystalline chemical made from boron that resists burning. Fire retardants like hydrated alumina, ammonium sulfate, and calcium borosilicate may also be added.
These fire retardant chemicals alter the insulation material to slow ignition, prevent flames from spreading quickly, and reduce smoke. This is a crucial safety addition for insulation used in home and office walls.
Antistatic Additives
Another common additive is antistatic compounds. This helps prevent static buildup on the insulation over time. Without antistatic additives, static charges could accumulate on the insulation surface, leading to popping and crackling sounds or small shocks.
Antistatic chemicals like long-chain aliphatic amines are infused into the binder. This helps absorb and dissipate any static charge, making the insulation non-conductive of electricity.
Antimicrobials
Since insulation is often exposed to warmth and humidity within building walls, microbial growth can occur over time. Pink insulation usually contains antimicrobial ingredients to prevent mold, mildew, and bacterial growth.
Antimicrobials such as zinc borate or oxides are added to discourage microbes from reproducing and spreading in the insulation. This helps the insulation remain clean and adequate for longer.
Read Also: 9 Ways Changing Furniture Can Improve Your Home
Manufacturing Process
The manufacturing process for pink insulation brings all these ingredients together. Here are the basic steps involved:
Glass Melting
First, raw materials like silica sand, soda ash, and limestone are melted together at extremely high temperatures exceeding 2500°F. This melted glass, called molten glass, is spun into thin fibers.
Fiber Spinning
The molten glass flows into specialized spinning machines. Like cotton candy machines, hundreds of tiny holes rapidly spin the glass into fine fibers.
This process can produce glass filaments thinner than human hair. The fibers are sprayed with binder onto a moving conveyor belt, where the fibrous mat begins to take shape.
Curing Ovens
The fiberglass mat then enters large curing ovens. These ovens harden and set the binder at high heat, firmly locking the glass fibers together. This forms a rigid, resilient sheet of fiberglass insulation.
Product Cutting
The cured fiberglass sheets are trimmed to specific sizes using cutting wheels, slitters, or compressed air knives. The sizes match standard insulation dimensions for walls, attics, and other applications.
Packaging
Finally, the fiberglass insulation is compressed and packaged into rolls or batts. The finished pink insulation rolls are wrapped in plastic sheeting or paper-facing before shipping to retailers or job sites.
Safety Equipment
The manufacturing process also utilizes extensive worker safety precautions. Plant employees wear protective clothing, gloves, goggles, and respirators due to the tiny glass dust particles produced. Proper ventilation, dust control, and air monitoring are critical.
This covers the main components and steps in producing traditional pink fiberglass insulation. The result is an affordable, easy-to-install insulation product that is valuable for energy efficiency in all buildings.
Alternatives to Fiberglass Insulation
While traditional pink insulation relies on fiberglass, some other materials can also be used:
- Mineral Wool – Insulation from molten slag, rock, or glass recycled from waste streams. Provides similar insulation capability as fiberglass.
- Cotton – Insulation made from recycled denim or other cotton products. Contains no fiberglass for a more natural insulation option.
- Cellulose – Insulation made from recycled newspaper, cardboard, or other paper and treated with fire retardant like boric acid.
- Polystyrene – Rigid foam insulation board made from expanded polystyrene plastic beads. Available in pink or blue tints.
- Polyurethane – Spray foam insulation that expands and hardens in place to seal cracks. Provides insulation and air sealing.
- EPS Foam – Molded expanded polystyrene rigid foam boards. Lower density than extruded polystyrene.
- Spray Foam – Foam insulation is sprayed in place and allowed to expand to form an air-sealing barrier and is made from polyurethane or epoxy resin.
- Aerogel – Exotic synthetic material derived from silica gel with low density and thermal conductivity. More expensive than traditional insulations.
So, while pink has become nearly synonymous with fiberglass insulation, consumers today have more choices depending on their needs and budget.
Pros and Cons of Pink Fiberglass Insulation
Pink fiberglass insulation has both advantages and disadvantages compared to other insulation materials:
Pros:
- Inexpensive cost
- Readily available
- Easy installation for DIYers
- Works for both thermal insulation and soundproofing
- It does not promote mold growth
- Fire-resistant with proper chemical treatment
- Loose-fill blown-in fiberglass can reach tight spaces
- Batts and rolls suitable for standard wall cavities
- A wide range of thicknesses and R-values are available
Cons:
- Can cause skin irritation during handling and installation
- Requires protective equipment like long sleeves, gloves, and goggles
- It is not environmentally friendly, as fiberglass production uses substantial energy
- Can sag and settle over time, reducing insulation value at the top of wall cavities
- It is not effective as an air-sealing insulation like spray foam
- It can cause respiratory issues if inhaled
- It may make existing skin itch if touched after installation
- Loose fiberglass debris can migrate through small gaps into living spaces
Pink fiberglass insulation offers an affordable and versatile option for thermally insulating homes and buildings. However, the safety, air gaps, and sustainability drawbacks may make some consumers consider other insulation materials for specific situations. Proper installation is critical to minimizing the downsides.
Common Applications for Pink Insulation
Thanks to its blend of low cost and effectiveness, here are some of the most common uses for pink fiberglass insulation:
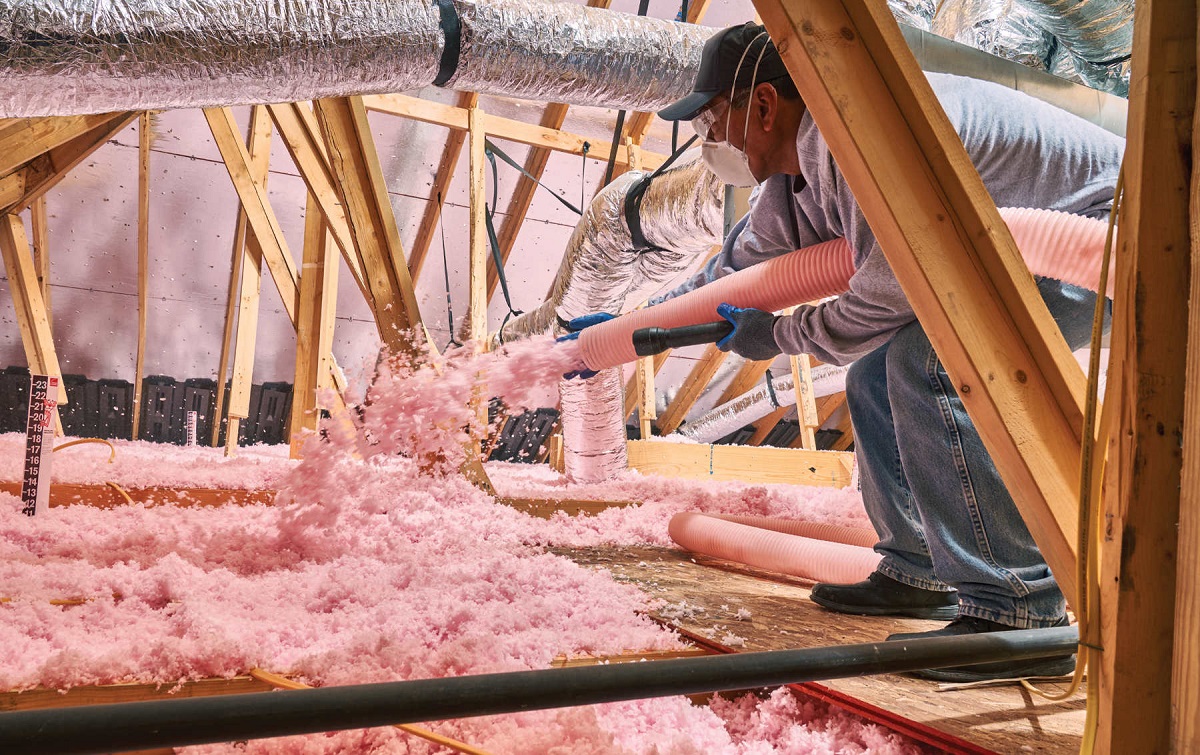
- Attic insulation – Placed between and over attic floor joists to insulate ceilings below. It helps block heat loss through the roof.
- Exterior wall insulation – Installed between wall studs to insulate outside house walls. It prevents air infiltration and reduces heating/cooling costs.
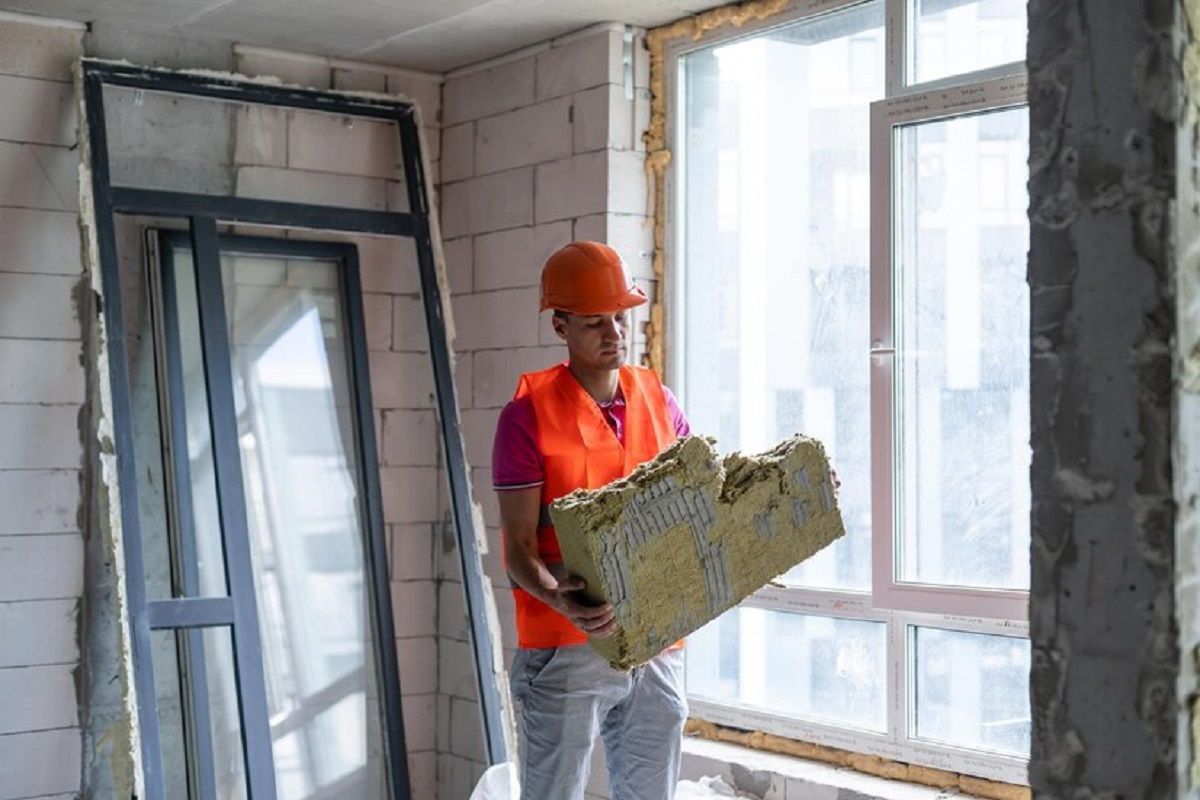
- Basement wall insulation – Applied against concrete basement walls before finishing. It makes below-grade spaces more comfortable.
- Duct insulation – Wrapped around HVAC ductwork to prevent energy waste from hot and cold ducts.
- Pipe insulation – Used to insulate hot water pipes and cold water lines to reduce heat transfer.
- Underfloor insulation – Placed beneath floor joists against subfloor to insulate floors above unheated spaces like garages or crawlspaces.
- Acoustic insulation – Added in interior walls for soundproofing between rooms. Absorbs noise.
- Masonry wall insulation – Special fiberglass inserts fit between concrete block cells or double brick walls.
For these applications, pink insulation provides an affordable way to improve energy efficiency and indoor comfort. It adapts well to standard construction methods and building materials. Proper installation in the correct amounts is critical to achieving optimal insulation performance.
How Much Pink Insulation is Needed?
Deciding how much pink insulation to install depends on several factors:
- Climate – Colder regions need higher insulation levels to retain heat in winter. Hot climates also benefit from reducing summer cooling demands.
- Insulation Location – Areas like attics, walls, crawlspaces, and basements have different recommended insulation levels based on their exposure to outdoor conditions.
- Energy Codes – Most jurisdictions specify minimum insulation R-values for new construction and renovations based on climate data. This sets a baseline coverage.
- Utility Costs – Homeowners may choose higher insulation amounts than their climate’s baseline to reduce their energy bills further.
- Home Layout – Multi-story homes often need more insulation than single-story. Larger homes need more total insulation than smaller spaces.
- Personal Comfort – Some homeowners want thicker insulation throughout the home for maximum comfort and noise dampening.
A balance between meeting local codes, budget, and personal energy goals will usually dictate suitable insulation levels. Consulting insulation guides or an energy auditor can provide specific home recommendations.
How to Install Pink Insulation
Proper installation of pink insulation is critical to ensuring it performs as expected:
- Read Labels – Check insulation labels for the correct type, R-value, and thickness needed for the location.
- Wear Protective Gear – Use long sleeves, pants, gloves, goggles, and mask to avoid skin and lung exposure.
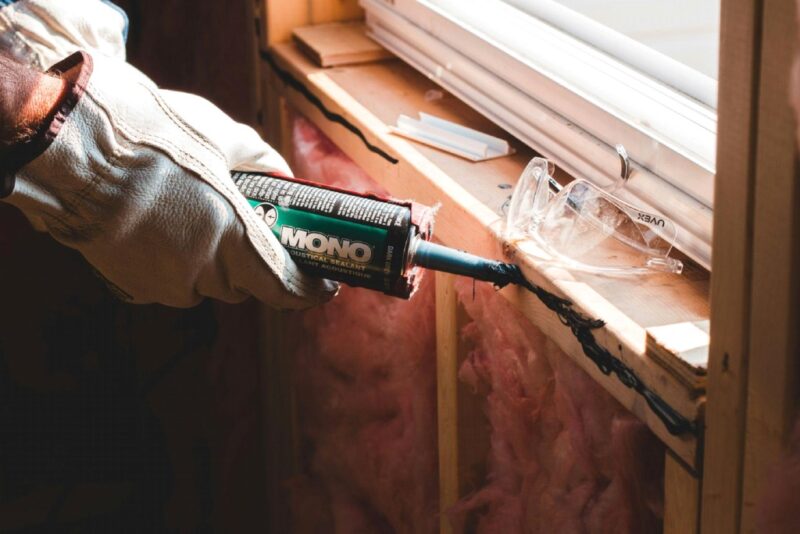
- Air Seal First – Caulk, spray foam or weatherstrip all cracks and gaps before installing insulation.
- Cut to Fit – Cut batts to fit space for wall studs and floor joists using a utility knife. Keep insulation flush to joists without gaps or compression.
- Use a Backing – For wall insulation, staple reinforcement mesh or baffles to studs to help hold insulation in place.
- Install Vapor Barrier – For exterior walls, face paper or plastic side of batts inward toward heated space. This helps manage moisture.
- Stuff and Spackle – Press insulation fully into stud cavities for finished walls, then spackle over batting to hold in place.
- Inspect Coverage – Verify that insulation fits snugly without gaps or voids and meets the target R-value throughout the area.
Following manufacturer instructions for the specific pink insulation you purchase is always recommended. Hiring a professional for attic or more complex installations is a good idea for homes with limited DIY experience.
Maintaining and Replacing Pink Insulation
Pink insulation is relatively durable but may need replacement or maintenance over time:
- Inspect attics, walls, and crawlspaces periodically for areas where insulation has sagged or pulled away from joists. This reduces its effectiveness. Spot-fix these gaps or add additional insulation if needed.
- Rodents, birds, and insects can sometimes nest in exposed insulation, disturbing its placement. Remove any pests, nesting material, and contaminated insulation. Replace with new insulation to fill cavities.
- Moisture intrusion, roof leaks, flooding, or excess humidity can damage insulation, especially if wet. Replace water-logged insulation once the leak is fixed and the area fully dries out.
- Use insulation depth gauges in attics and walls to check if the insulation has settled over the years. Top up low spots with new insulation to maintain even coverage at the target R-value.
- Renovations, upgrades like attic conversions, and rewiring/replumbing may disturb existing insulation. After completing work, ensure insulation coverage meets codes for the new space layout and use.
With occasional inspections and repairs, quality pink fiberglass insulation should last decades before requiring total replacement. Maintaining proper insulation coverage saves energy over the entire life of the home.
Is Pink Insulation Toxic or Safe?
The safety of pink insulation depends on proper precautions during handling:
- Inhalation – If inhaled, freshly installed loose-fill fiberglass can release particulates that aggravate the lungs. Use respirators during installation until insulation is fully enclosed in walls or attics.
- Skin Contact – The tiny glass fibers may irritate the skin and eyes during handling. Wear long sleeves, pants, gloves, and goggles when installing. Take a shower and change clothes afterward.
- Existing Insulation – Fiberglass previously installed and sealed in walls or attics is generally not a respiratory concern. But do wear gloves, mask, and goggles if opening a wall.
- VOCs – Some binders off-gas volatile organic compounds (VOCs) temporarily after installation. Keep spaces well-ventilated until VOCs disperse.
- Fire Protection – Look for insulation labeled as fire-resistant with fire-retardant additives. This reduces fire spread risk if ignition occurs.
So, while not acutely toxic once contained in walls, proper safeguards during installation are crucial. Overall, the benefits of insulation for energy savings and comfort outweigh the moderate risks. Still, those with respiratory issues should consult their physician before working with fiberglass insulation directly.
Is Pink Insulation Environmentally Friendly?
Fiberglass insulation has some positives and negatives regarding environmental impact:
Positives
- Provides substantial energy savings over the life of a building. This reduces carbon emissions from power generation.
- It is made partially from recycled glass content.
- Do not use blowing agents that deplete stratospheric ozone.
- Contains recycled scrap fiberglass material in some products.
Negatives
- Production of virgin fiberglass and binders uses significant energy and natural gas.
- Binder chemicals can emit VOCs during and after manufacture.
- Boric acid added as fire retardant can potentially leach out over time.
- Fiberglass is challenging to recycle after removal and use.
It has more complex environmental trade-offs than some insulation types like cellulose or cotton. Fiberglass insulation is not renewable or biodegradable but enhances energy conservation in buildings. Consumers can compare ecological impacts when selecting insulation products that best fit their project.
Is Insulation Pink for Any Special Reason?
The pink color of traditional fiberglass insulation serves both aesthetic and functional purposes:
Visibility – The bright pink color makes the insulation more noticeable during installation. This helps confirm complete and proper coverage within wall cavities or attic spaces.
Warning – The color also warns installers that fiberglass is present, reminding them to use protective equipment to cover exposed skin and eyes.
Source Marking – Specific hues help identify the insulation manufacturer and production facility.
Binder Dye – Color pigments are added to binder liquids to produce distinctive pink shades before curing. Different colors are achievable using alternate pigments.
Marketing – Decades of use have made pink synonymous with fiberglass insulation. The color is now connected to insulation branding and advertising.
So, while not mandatory, the vibrant pink color benefits the insulation industry and supply chain. However, some manufacturers also offer fiberglass insulation in grey, green, yellow, or other hues based on customer preferences.
5 Key Takeaways About Pink Insulation
In summary, here are five key facts to remember about standard pink fiberglass insulation:
- Primarily contains microscopic fiberglass fibers bonded by plastic resins.
- Provides thermal and acoustic insulation for walls, attics, ducts, and other uses.
- It must be installed properly throughout spaces to form a continuous insulating barrier.
- Requires safe handling and protective equipment to minimize skin and respiratory irritation.
- Delivers proven energy savings, comfort, and noise reduction when installed correctly in sufficient amounts.
FAQs
Q: Is pink insulation itchy?
A: Handling fresh, loose-fill pink fiberglass insulation can cause temporary skin itching due to the delicate glass fibers. Wearing long sleeves, pants, gloves, and goggles prevents skin contact and irritation during installation. Once enclosed within walls or attics, existing insulation generally does not cause itching.
Q: Does pink insulation go bad?
A: Properly installed pink fiberglass insulation is highly durable and does not readily biodegrade or expire. However, over decades, moisture damage, pests, repeated compression, or disturbance can reduce insulation effectiveness. Monitoring conditions and topping up low spots preserves thermal performance.
Q: Is pink insulation toxic?
A: Fresh fiberglass insulation can temporarily irritate the lungs if inhaled during handling. Sealed insulation is not a respiratory hazard. Binder materials and fire retardants meet health safety standards when cured and enclosed. With precautions during installation, it poses minimal toxicity risk in a finished home.
Q: Is pink insulation flammable?
A: Plain fiberglass is combustible when exposed to flame. But commercial pink insulation contains fire-resistant additives that deter ignition and slow fire spread. This makes adequately treated pink insulation acceptably fire-rated for in-wall and attic use per codes.
Q: Does pink insulation cause cancer?
A: After extensive research over decades, fiberglass insulation has not been demonstrated to cause cancer or other diseases. While the glass fibers can irritate skin and lungs if directly handled, the cured resins pose minimal health risks for installers and building occupants. Proper precautions make risks negligible for this common insulation material.
In Summary
Traditional pink fiberglass insulation provides time-tested thermal and acoustic insulation for homes and buildings. While handling requires safety measures, it blocks heat transfer at an affordable price when properly installed. Fiberglass’s iconic pink coloration delivers comfort, energy savings, fire resistance, and noise control. Understanding what standard pink insulation contains and how it is made allows homeowners to use it effectively. With appropriate precautions and coverage amounts, pink insulation remains a top choice for cost-effective insulation projects.